Sunday, April 29, 2018

Calling Dynamics CRM 365 actions using the Web API (from outside CRM and inside CRM using JavaScript)

Calling unbound Dynamics CRM actions using the Dynamics 365 Web API


We first need to create an unbound action. With unbound I mean “not related to a Dynamics CRM entity”. The image below shows you what a simple unbound action could look like. This action does nothing else but checking the inbound parameter called “Age”. If this “Age” parameter (which will be send to the action using the Web API) is 18 or higher, the action will set the output parameter called “Valid” to “true” and will return this value. If this “Age” parameter is 17 or lower, the action will set the output parameter “Valid” to “false” and will return this value. The image below shows this action.

image


When we activate this action and browse to (or send a GET request to) “[ORGANIZATION URL]/api/data/v8.1/$metadata”, we will see that metadata about this new action will be exposed by CRM. The image below shows the exposed metadata about the new action:
image
My action is called “dys_CheckAge”, so for an unbound action, we could now send a POST to “[ORGANIZATION URL]/api/data/v8.1/dys_CheckAge”. We should of course send a JSON object as the body of the POST request, which in our case only has one parameter called “Age”. The object should like this:
{
  "Age": 12
}
If you now send a POST request using for example SOAPUI in which the “Age” property has a value of 12, you will see that the action will return the value “false”.
image
If you send a POST request (using for example SOAPUI) in which the “Age” property has a value of 21, you will see that the action will return the value “true”.
image
If you take a look at what actually goes over the wire (using for example Fiddler), you will see that it is just a simple POST request to the Web API with a simple body:
image
Especially in combination with a Custom Workflow Activity, this can be a very powerful thing to use which can be executed by itself. Calling this action cannot only be done from “inside” CRM using JavaScript, but this can of course also be done from another application (BizTalk / custom .NET application / etc).


Calling a bound Dynamics CRM actions using the Dynamics 365 Web API


Calling a bound Dynamics CRM action (an action which is related to a Dynamics CRM entity) works almost the same, but works slightly different. The image below shows you what a simple bound Dynamics CRM action could look like:
image
As you can see, the action is bound to the entity “Contact”, has 1 input parameter of type boolean and this input parameter is called “IsMale”. If the input parameter “IsMale” has the value “true”, the “Gender” field will be set to “Male” and the contact will be updated. If the input parameter “IsMale” has the value “false”, the “Gender” field will be set to “Female” and the contact will be updated. 
As soon as you activate this action and browse to (or send a GET request to) “[ORGANIZATION URL]/api/data/v8.1/$metadata”, we will see that metadata about this new bound action will also be exposed by CRM. The image below shows the exposed metadata about the new action:
image
The difference between calling an unbound action and a bound action is the URL. As said above, an unbound action can be access by “[ORGANIZATION URL]/api/data/v8.1/[ACTION-NAME]” and a bound action can be accessed / called by using the following URL: “[ORGANIZATION URL]/api/data/v8.1/ENTITYNAME(ENTITY-ID)/Microsoft.Dynamics.CRM.[ACTION-NAME]”. 
If you would now send a POST request (using for example SOAPUI) in which the “IsMale” property is set to “true”, you will see that the action will set the contact “Gender” to “Male”.
image
If you again would send a POST request (using for example SOAPUI) in which the “IsMale” property is set to “false”, you will see that the action will set the contact “Gender” to “Female”.
image
image

Calling a Dynamics CRM actions using JavaScript and the Dynamics 2016 Web API

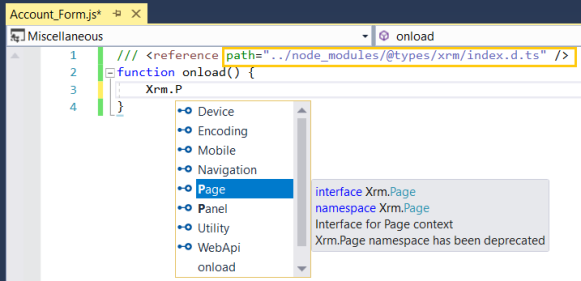
A Dynamics CRM action can also contain business logic which can be triggered (called) using JavaScript and which helps the user (client-side) during data entry. One of the actions we created above was the “CheckAge” action which expects an “Age” property and returns the value “true” if the age is equal or above 18 (the JSON object returned will have a “Valid” property of type boolean). In all other cases it will return the value “false”. This action can be called using the following JavaScript:

"use strict";
var Dys = window.Dys || {};

Dys.ValidateField = function (context) {
    var data = {
        "Age": context.getEventSource().getValue()
    };

    //dys_CheckAge is the name of the custom unbound action in this case
    Dys.CallAction("dys_CheckAge", data, Dys.ValidateFieldUsingActionCallBack);
}

Dys.CallAction = function (query, data, callback) {
    var url = Xrm.Page.context.getClientUrl() + "/api/data/v8.0/" + query; 

    var req = new XMLHttpRequest(); 
    req.open("POST", url, true);
    req.setRequestHeader("Accept", "application/json"); 
    req.setRequestHeader("Content-Type", "application/json; charset=utf-8"); 
    req.setRequestHeader("OData-MaxVersion", "4.0"); 
    req.setRequestHeader("OData-Version", "4.0"); 
    req.onreadystatechange = function () { 
        if (this.readyState == 4) { 
            req.onreadystatechange = null; 
            if (this.status == 200) {
                callback(req.response);
            } else { 
                var error = JSON.parse(this.response).error; 
                alert(error.message); 
            } 
        } 
    };
    req.send(window.JSON.stringify(data));
}

Dys.ValidateFieldUsingActionCallBack = function (response) {
    alert("The value is: " + JSON.parse(response).Valid);
}


The JavaScript function “Dys.ValidateField” will be called whenever you change a custom field on a (Contact) form. This method will create a JSON object with 1 property called “Age” and then this function will call the JavaScript function “Dys.CallAction”, which will execute the Dynamics CRM action called “dys_CheckAge”. When this “Dys.CallAction” JavaScript function is finished, it will execute the JavaScript (callback) function “Dys.ValidateFieldUsingActionCallBack”, which will show the value which is returned by the Dynamics CRM action (property “Valid” of the response JSON object).

Summary

Although this example shows very simple scenario’s, the possibilities are clear:
  • You are able to execute pieces of reusable (business) logic from inside or outside CRM as if it were a “custom service”.
  • Althoug creating and updating CRM data is possible without using the Dynamics CRM actions as well (by simply sending a POST the the Web API), using the Dynamics CRM actions allow you to apply business logic before anything is created / updated.
  • Complex business logic can be executed if you create a Custom Workflow Activity (CWA) which is used inside your Dynamics CRM action.
  • A Dynamics CRM action also enables you to decouple the inside of CRM from the outside of CRM. With this I mean that you can keep your input parameters the way ther are, but do the translation (to a changed fieldname for example) in the action. This way, the outside world can reuse your action the way they are used to, while you shuffle things around within Dynamics CRM.

Tuesday, April 24, 2018

IntelliSense in Jscript/TypeScript file – Dynamics 365

In this article, lets see how to configure intellisence with XRM syntaxes in your Jscript/TypeScript files.
To enable IntelliSence, you need to install xrm npm package to your Visual Studio.
Steps to install NPM package:
  • To install npm package, you need to download and install a Visual Studio extension : Package Installer
Intelli - 5
  • Post installation, from your Visual Studio, select ‘Quick Install Package’ from Menu
Intelli - 6
  • From the popup,
    • Select ‘npm’ in the dropdown
    • In the textbox, type ‘@types/xrm
    • Click on ‘Install’
Intelli - 7
  • Post package installation, refresh the project and you should see a new folder ‘node_modules
    • Note: If you dont get the ‘node_modules’ folder, check your project’s physical location and add the folder to your Visual Studio project.
Intelli - 8
  • In above screen, ‘TypeScript’ is my project name and post above steps, I got the ‘node_modules’ project.
Enable IntelliSence in your Jscript/TypeScript file:
  • Open your script file
  • Drag and drop the ‘index.d.ts’ file from ‘node_modules’ folder on to your script file.
    • Alternatively you can also this syntax
      • /// <reference path=“../node_modules/@types/xrm/index.d.ts />
Intelli - 1
  • Start typing ‘Xrm’ and you should see the syntaxes.
Notes:
  • Those who are wondering what is a npm, it is a package manager for the JavaScript programming language.
  • www.npmjs.com hosts thousands of free packages to download and use.

Saturday, April 21, 2018

POWER BI INTEGRATION WITH MICROSOFT DYNAMICS 365 Out of box

Today i am going to show and explain you how to integrate Dynamics 365 with Power BI Out of box..

First of all you need to enable the integration so go to Dynamics 365 > Settings > Administration > System Settings >Select  Reporting Tab


That's all we need to configure in the Dynamics 365..

We are going to connect to one of the Content Packs made for Dynamics 365 inside Power BI, so we need the OData feed from D365. Go to Settings-> Customizations ->Developer Resources:


From the above image copy the url..upto the .com...

Login to the Power BI and Login with the same account as you logged into Dynamics 365.

Open up the side bar menu and go to the Get Data


Under the Content Pack Library:

Select Services:


Then you will be prompted with the below page and search for Dynamics 365 .. and select the Customer Service Analytics for Dynamics 365..


You will be prompted with the following page and click on the get in now button..


Again new pop up will come up and place the url copied from the developer resource of Dynamics 365

https://yourcompany.api.crm11.dynamics.com


Click on Next button then you will be prompted with the below pop up ..
In the pop up , Select Authenticated Method =  " oAuth2 " and the click Sign in.


Then you will get sign in page and select the login credentials that you have used for the Dynamics 365 and Power BI


Click on the credentials then ...


After few minutes you will be prompted with beautiful dashboard..


Yahoo!.. we have powerful and very useful dashboard is ready to view..

Then head back to Dynamics 365 > Services > Dashboard.. then Click on the "NEW" dropdown..
you will be prompted with "Power BI Dashboard" select it..


After clicking on the Power BI Dashboard ..


Then check the box for enable for mobile and click on save button..


Here you go .. you can see "Customer Service Analytics for Dynamics 365 Dashboard.. at the moment on the current dashboard 10 underlying reports and if you want to go back to Power BI, you can click on the top right side button " OPEN IN POWER BI".. then you will in POWER BI again..

This is very cool....


 if you want to share this dashboard with other colleagues in your organization you’ll have to share the dashboard in PowerBI. Then the users can import it to their personal dashboard inside D365, so security is pretty much handled by PowerBI. The content packs made by Microsoft gives you a great starting point for reports, I recommend  every one of them

As always, if you need any help,

Tuesday, April 17, 2018

Fetch XML 5000 Records Limitation

Fetch all records

Have you ever tried to write a code which will get you all records from a specific entity? It's harder then you think it is! Everybody who is a bit aware of the CRM SDK thinks it should be a fetch statement like this:

<fetch mapping='logical'><entity name='account'><attribute name='accountid'/></entity>

WRONG!
This would only give you the first 5000 records in the database! It is written down in the SDK with small letters, but it could drive you crazy..

There are two solutions for this issue.
1) Add a registery setting to specify not to implement MaxRowsPerPage
2) Modify the fetch statement and merge several results

Here are the details for each solution
1st solution
Search in the SDK for the word "TurnOffFetchThrottling". You should add this as DWORD registery setting to HKLM\Software\Microsoft\MSCRM. Set the value to 1. You will now not have the 5000 records limit.

2nd solution
Modify your fetch statement to include paging and count numbers. Store all the data in an DataSet and perform that series of code over and over again as long as there is data coming.

Here's the script you should use to get all accountid's (for clarity and the ease of use I have added a function called "FetchDataSet").


private DataSet FetchAllAccountIds(){
int i=1;
bool bFinished = false;
DataSet dsAllData = new DataSet();
while (bFinished == false)
{
StringBuilder sbFetch = new StringBuilder();
sbFetch.AppendFormat("<fetch mapping='logical' page='{0}' count='5000'>", i);
sbFetch.Append("<entity name='account'>");
sbFetch.Append("<attribute name='accountid'/>");
sbFetch.Append("<attribute name='new_12_accountid'/>");
sbFetch.Append("</entity>");
sbFetch.Append("</fetch>");
DataSet dsTempResult = FetchDataSet(sbFetch.ToString());
dsAllData.Merge(dsTempResult);
if (dsTempResult.Tables[0].Rows[0]["morerecords"].ToString() == "0")
{
bFinished = true;
}
else
{
i++;
}
}
return dsAllData;
}

private DataSet FetchDataSet(string fetchXml)
{
string strResult = service.Fetch(fetchXml);
DataSet ds = new DataSet();
System.IO.StringReader reader = new System.IO.StringReader(strResult);
ds.ReadXml(reader);
return ds;
}


I hope this saves you some time!

Dynamics 365-Twitter Integration


Dynamics CRM always need integration with multiple system integration.
Basically, Dynamics CRM sales and marketing module always looking for more integration with social sites like Facebook, Twitter, LinkedIn etc.
 In my last project there was a requirement to integrate Dynamics CRM Marketing Campaign with Twitter. When organization create any new campaign/promotion organization need to spread tweet about that, so customer know about their campaign and promotions.
Here, I will tell how you can integrate your Dynamics 365 with Twitter.

Step1: - Create Application in Twitter. I will demonstrate how you can create application in Twitter.

Open given URL https://apps.twitter.com/ in browser and login with our organization twitter account.


Now click on “Create New App”. And provide your application details. In website textbox enter your company web address. If you do not have any web address, use can also use CRM online address. Make sure your web address should be accessible via web. Any local website will not work.


Now click on “Create Your Twitter Application”.


Now my Application is created with Consumer Key. We also need Access Token to complete our application. So, click on “Create my access token” button.
Now copy your Consumer Key (API Key), Consumer Secret (API Secret), Access Token, Access Token Secret keys and save for future use. Also make sure Access level should be “Read and Write”.
Now our first step is completed.

Step 2: - Create Custom Workflow.

We need to create custom workflow to send Tweet from Dynamics CRM.
Open visual studio and create a class library project


Right click on project and select “manage nuget package” and write TweetSharp in search bar.
Now click on install button. It will TweetSharp.dll in your project.


Now we need to pass keys at runtime, so we need to create input arguments for Keys and our message that needs to tweet.
Create new object of TwitterService class. And call SendTweet method.
Add signature to your project. And build the solution.
Now My custom workflow is created.

Step 3: - Create a Merged assembly.

In our custom workflow we have used external assembly to call twitter. So, we need to merge all assembly in single assembly.
We have multiple option to merge assembly in single assembly. But my favorite tool is https://ilmergegui.codeplex.com/ .
Download and install this ILMerge UI.


Open ILMerge and click on “Add assembly” and select three dependent assembly and one your custom workflow assembly.


Now select your custom workflow assembly. Mark check “Sign with key file” option and select your project signing key. Also provide output location of assembly. Than click on “Merge” button.
Now your final assembly is created.

Step 4: - Register your assembly in Dynamics CRM/365.

Now are ready with our assembly. We just need to register this in Dynamics CRM/365 and start playing with this.
If you are using new version (9.0 or higher) of Dynamics 365 old Plugin registration tool will not work.
Now register your assembly.


Now our assembly is registered.

Step 5: - Create workflow in Dynamics CRM/365.

Login to your Dynamics CRM organization and create new process.
I am using Campaign entity to send tweet. Make sure your tweet field should not have text length greater than 280.
I am also using Campaign Status Details field (Status Reason) = “Launched” to send tweet.


Now provide your Keys details that we stored in step 1. You need to provide key information in your custom workflow calling step.
Activate your workflow.

Step 7: - Send Tweet from Dynamics CRM/365.

Create a new campaign. Enter your promotion needs to tweet. Select status reason as “Launched”.


Save the record and check your tweeter account. You will see new tweet there.

Get files of last hour in Azure Data Factory

  Case I have a Data Factory pipeline that should run each hour and collect all new files added to the data lake since the last run. What is...